

For most designers and small brands ordering custom heat-applied patches, double-sided heat-seal film (commercial heat-seal) is the go-to backing for durable, frequent-wash applications on cotton and denim. Iron-on heat-seal adhesive melts into garment fibers under heat and pressure, creating a semi-permanent bond that holds through regular laundering. For heat-sensitive fabrics or regulated uniform items, sew-on remains the most reliable fallback.
Here’s a quick map of the main patch adhesive types and where each fits:
- Commercial heat-seal film (double-sided): Best for cotton, denim, canvas, and twill garments. High durability, wash-tolerant with a heat press. The standard choice for retail and production runs.
- Consumer iron-on / fusible web: Good for home application on flat cotton items. Medium durability; adhesive can weaken after repeated washing or on textured fabrics.
- Low-temp hot-melt adhesive: Designed for heat-sensitive surfaces like polyester blends or thin synthetics. Medium durability; requires lower press temperatures.
- Pressure-sensitive (peel-and-stick): Instant tack, zero heat needed. Temporary only; not machine-washable for long-term wear.
- Hook-and-loop (Velcro): Removable and repositionable. Medium durability; adds visible bulk but great for tactical gear, uniforms, or event patches.
- Sew-on (no adhesive): Highest durability and wash tolerance. Required for leather, suede, heavily coated fabrics, and MIL-spec uniform applications where authorized attachment methods are specified.
Octopatches uses commercial heat-seal film as the standard backing for its custom patches, with sew-on and Velcro options available for projects where heat application isn’t appropriate.
Key Takeaways
Commercial heat-seal film on cotton and denim, tested with a sample wash before production, is the most reliable path to durable heat-applied patches for designers and small brands.
| Point | Details |
|---|---|
| Best backing for most garments | Commercial heat-seal film performs best on cotton, denim, and canvas with a heat press. |
| Peel-and-stick is temporary only | Pressure-sensitive backings are not machine-washable; use them for positioning or short-term wear only. |
| Sew-on for sensitive or regulated items | Leather, nylon, coated fabrics, and MIL-spec uniforms need sew-on or Velcro, not heat adhesive. |
| Always test before full production | Run 5–10 wash cycles on a sample patch to confirm adhesive choice and pressing parameters. |
| Octopatches for no-minimum orders | Octopatches offers commercial heat-seal patches with sample packs and no minimum order, so you can test before scaling. |
Table of Contents
- What are the main patch adhesive types and how do they work?
- Which adhesive works best for your patch material and garment fabric?
- How do you apply heat-activated patches for consistent results?
- How durable are heat-applied patches, and what should you do when they fail?
- When should you skip heat adhesive and choose sew-on or Velcro?
- How Octopatches approaches heat-activated backings for designers and small brands
- Your pre-order checklist for heat-applied patches
- Octopatches makes custom heat-applied patches easy to order and test
- Sources
What are the main patch adhesive types and how do they work?
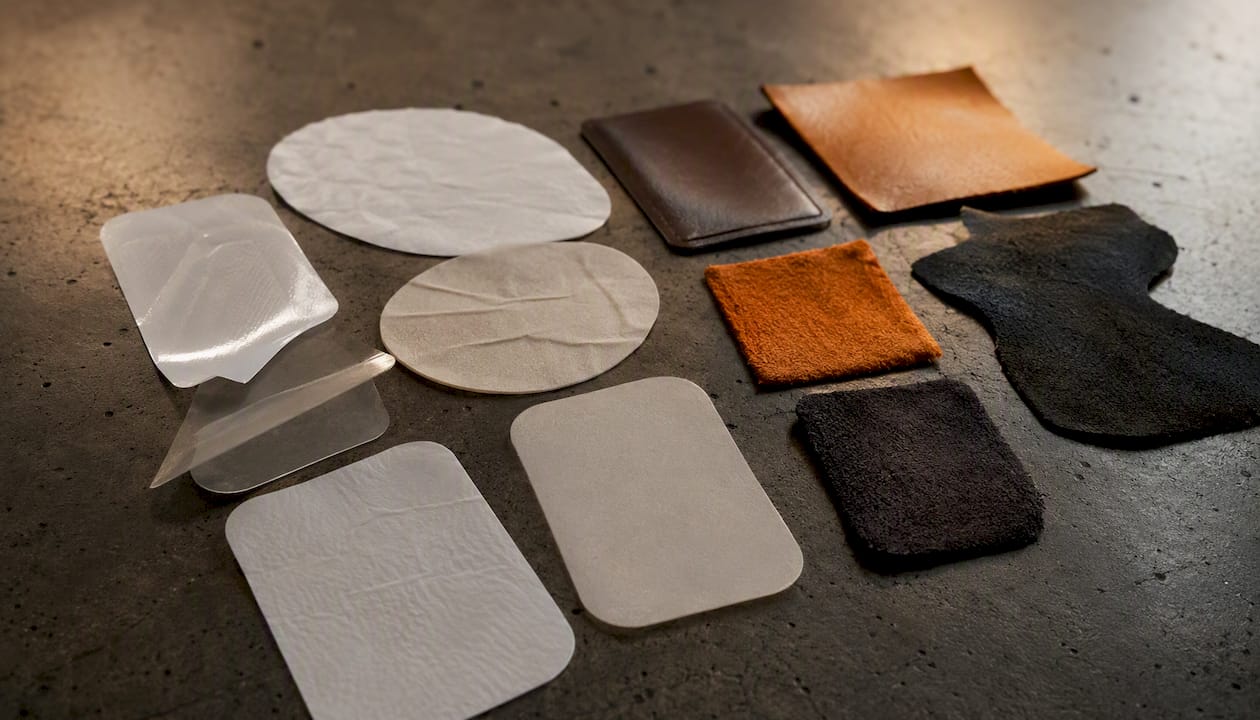
Understanding the construction behind each backing helps you match the right adhesive chemistry to your patch material and garment fabric. Here’s how the most common types compare.
| Backing Type | Best For | Temp & Time (Heat Press) | Durability / Washability | Finish / Thickness | Material Limits | Removability | Application |
|---|---|---|---|---|---|---|---|
| Commercial heat-seal film | Cotton, denim, canvas, twill | 300–320°F, 10–15 sec, firm pressure | High / wash-tolerant | Thin, clean edge | Avoid nylon, coated shells, leather | Difficult; semi-permanent | Heat press preferred |
| Consumer iron-on / fusible web | Flat cotton, home projects | 300–320°F, 15–20 sec (iron) | Medium / degrades with washing | Slightly thicker | Stretch, textured, or synthetic fabrics | Moderate with heat | Household iron acceptable |
| Low-temp hot-melt | Polyester blends, thin synthetics | 250–270°F, 10–15 sec | Medium / moderate wash life | Thin | Coated or laminated fabrics | Moderate | Heat press recommended |
| Peel-and-stick (pressure-sensitive) | Temporary placement, event patches | No heat required | Low / not machine-washable | Thin | Most fabrics (temporary only) | Easy; peels off | Hand application |
| Hook-and-loop (Velcro) | Tactical gear, uniforms, event items | Varies by backing type | Medium / depends on base fabric | Thick, visible | Delicate knits, sheer fabrics | Fully removable | Iron or press (loop side) |
| Sew-on | Leather, suede, regulated uniforms | No heat required | Highest / industrial wash-safe | No adhesive profile | None | Permanent (requires seam ripper) | Machine or hand sew |
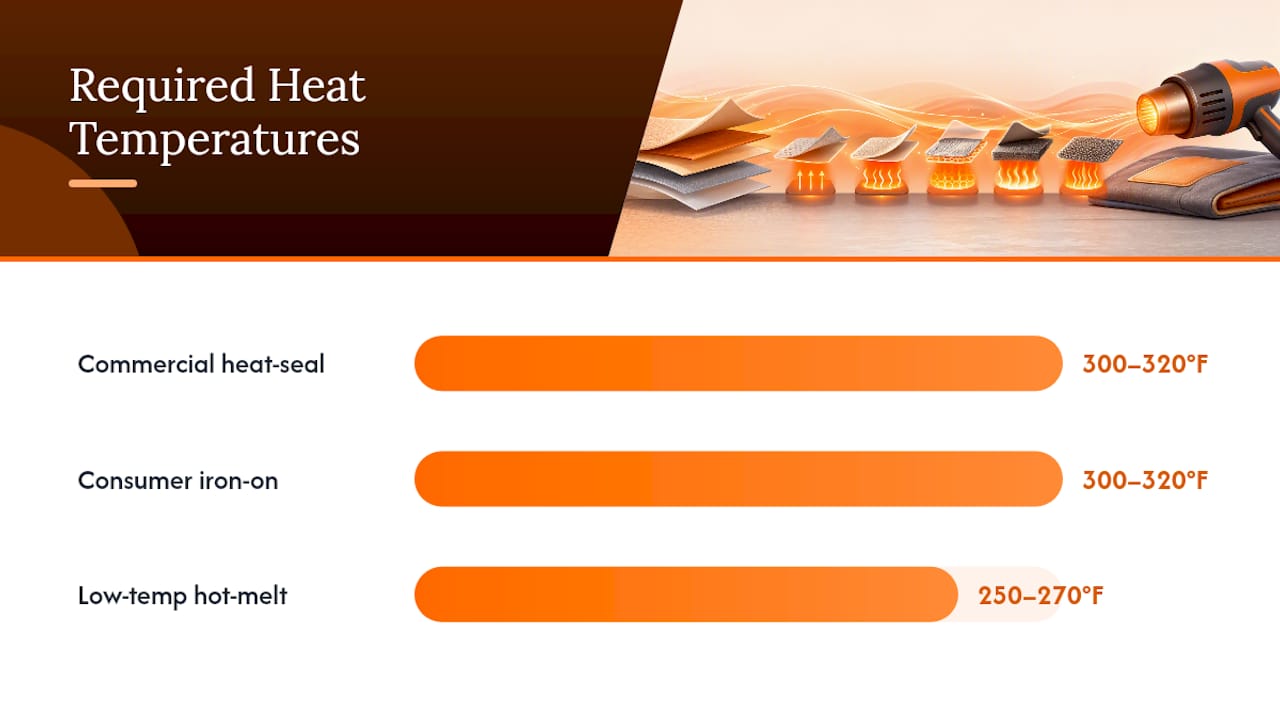
Commercial heat-seal film produces a stronger, more wash-tolerant bond than consumer iron-on films when applied with a commercial heat press, making it the preferred choice for production-grade patches.
Common failure modes to watch for by backing type:
- Heat-seal film: Edge lift on thick or textured fabrics; adhesive migration onto pressing equipment if no sheet is used.
- Consumer iron-on / fusible web: Adhesive weakening after multiple wash cycles; poor adhesion on stretch or ribbed fabrics.
- Low-temp hot-melt: Bubbling on uneven surfaces; bond failure if pressed at standard (higher) temperatures.
- Peel-and-stick: Peeling within the first wash; residue left on fabric after removal.
Exact temperature and dwell time settings depend on the adhesive manufacturer’s specifications. Always treat published ranges as starting points and test on a fabric swatch first.
Which adhesive works best for your patch material and garment fabric?
The patch facing and the garment fabric both influence which backing performs. Here’s a practical match guide.
By patch facing material:
- Embroidered twill and woven patches: Commercial heat-seal film works well; the flat, stable base bonds cleanly.
- PVC and rubber patches: Heat-seal film bonds to the PVC backing layer; confirm the PVC is not too thick for heat penetration.
- Faux leather (Octopatches’ specialty materials like faux leather, denim, carbon fiber): Commercial heat-seal is compatible; check the 3D flex and specialty styles for material-specific guidance.
- Genuine leather patches: Skip heat adhesive entirely; the leather facing can scorch. Sew-on is the right call.
- 3D raised / foam effects: Low-temp adhesive or sew-on; high heat can compress or distort the foam structure.
By garment fabric:
- Cotton and denim: Best candidates for commercial heat-seal. The fibers accept adhesive well and tolerate press temperatures.
- Canvas and heavy twill: Same as cotton; firm pressure helps adhesive penetrate the weave.
- Polyester: Use low-temp adhesive; standard press temperatures can scorch or shrink polyester.
- Nylon and coated shells: Heat can damage these fabrics; sew-on or hook-and-loop is the safer choice.
- Stretch / spandex blends: Avoid heat-seal; adhesive bonds poorly on stretch and the fabric may pucker. Sew-on or Velcro instead.
- Leather and vinyl garments: No heat application. Sew-on only.
Pro Tip: Always test on a scrap of the actual garment fabric before committing to a full run. If you’re ordering production quantities, request a sample pack from Octopatches and run at least one wash cycle before approving the order.
How do you apply heat-activated patches for consistent results?
A heat press gives you the most consistent results. A household iron works for small, flat projects, but uneven pressure and temperature variation make it less reliable for production. A heat press reduces uneven adhesion and edge lift compared to a household iron, and most adhesive manufacturers publish heat-press settings specifically.
Step-by-step application:
- Pre-press the garment for 3–5 seconds to remove moisture and wrinkles.
- Position the patch on the garment; use a light tack spray or peel-and-stick backing to hold it in place temporarily if needed.
- Cover with a Teflon pressing sheet or parchment paper to protect both the patch face and the platen.
- Heat press: Set to 300–320°F (150–160°C) for standard heat-seal; 250–270°F for low-temp adhesives. Apply firm, even pressure for 10–15 seconds.
- Household iron: Use the cotton/linen setting (no steam). Press firmly for 15–20 seconds, moving slightly to cover the full patch area.
- Allow full cooling before peeling back the pressing sheet or testing the bond. Pulling the patch while hot can cause edge lift.
- Flip the garment and press from the reverse side for 5–10 seconds to reinforce the bond.
- For high-wear corners, add a few stitches at each corner after pressing.
Cut adhesive film slightly smaller than the patch to prevent squeeze-out at the edges, and always use a pressing sheet to keep adhesive off your equipment.
Pro Tip: For curved surfaces like hats or caps, press in short, staged intervals using a cap press or rounded last with a backing stabilizer. A single prolonged press on a curved surface causes bubbling and poor edge adhesion.
Safety note: Never use a steam iron on heat-seal patches. Steam introduces moisture that weakens the adhesive bond. Avoid over-pressing synthetic fabrics; excess heat can scorch, shrink, or permanently distort polyester, nylon, and spandex. When in doubt, drop the temperature 10–15°F and extend dwell time slightly rather than increasing heat.
How durable are heat-applied patches, and what should you do when they fail?
Durability varies significantly by backing type. Peel-and-stick is temporary; consumer iron-on is medium durability; commercial heat-seal and sew-on offer the highest wash tolerance, though even iron-on adhesive can weaken after repeated washing or on high-stretch fabrics.
Wash care to extend patch life:
- Wash garments inside out on a cold or warm gentle cycle.
- Avoid high-heat tumble drying; air dry or use low heat.
- Skip dry cleaning solvents, which can dissolve adhesive.
- Run a sample wash test (5–10 cycles) before approving a production run.
Troubleshooting common failures:
- Edge lift: Re-press with a fresh piece of heat-seal film cut to the lifted area, using a pressing sheet. Add corner stitches for a permanent fix.
- Bubbling: Usually caused by moisture or uneven pressure. Re-press with dry heat and firm, even pressure.
- Adhesive squeeze-out: Trim future adhesive cuts slightly smaller than the patch. For existing squeeze-out, a warm iron and parchment paper can lift residue from the fabric.
- Full delamination after washing: The adhesive type may not be compatible with the fabric. Switch to commercial heat-seal with a heat press, or move to sew-on.
Pro Tip: Build a QA step into every production run. Order a sample, wash it 5–10 cycles, and inspect the edges before approving the full order. This one step catches adhesive mismatches before they become costly reprints.
When should you skip heat adhesive and choose sew-on or Velcro?
Some projects simply aren’t good candidates for heat application. Choosing the wrong method here damages garments or creates patches that fail in the field.
Choose sew-on when:
- The garment is leather, suede, or genuine vinyl.
- The fabric is a heavily coated shell, waterproof membrane, or laminated material.
- The item will be laundered industrially (commercial laundry services use temperatures and agitation that exceed consumer heat-seal limits).
- The application is subject to MIL regulation or workplace uniform rules that specify authorized attachment methods.
- The patch is on a delicate knit, sheer fabric, or stretch-heavy garment.
Choose hook-and-loop (Velcro) when:
- The patch needs to be swapped out regularly (tactical gear, event staff, rotating uniform patches).
- The garment fabric is too delicate for heat but sewing isn’t practical.
Trade-offs to weigh:
- Sew-on costs more in labor but delivers the highest durability and works on any fabric.
- Heat-seal is faster and cheaper per unit but requires compatible fabrics and proper equipment.
- Velcro adds visible thickness and a slightly stiffer profile; the loop side on the garment is permanent unless removed.
For high-volume runs on unusual materials like thick 3D foam, carbon fiber, or specialty faux materials, professional heat-seal equipment and production services give you more consistent results than a household iron ever will.
How Octopatches approaches heat-activated backings for designers and small brands
Octopatches recommends commercial double-sided heat-seal film as the standard backing for durable retail and high-wash applications, and sew-on or Velcro for heat-sensitive or regulated items. Here’s how that plays out in practice:
- Standard backing: Commercial heat-seal film, compatible with cotton, denim, canvas, and most twill garments. Designed for heat press application at the temperature and time ranges covered in the application instructions.
- Sample packs: Available so you can test adhesion and wash performance before committing to a full run. This is the single most effective way to confirm your backing choice.
- No minimum orders: You can order a small batch, test it, and scale up with confidence. No need to commit to hundreds of units before you know the adhesive works on your specific fabric.
- Artwork conversion and setup: Octopatches offers a professional design setup service to convert your artwork into production-ready files, reducing errors that can affect patch quality and adhesive performance.
- Material variety: From faux leather and denim to carbon fiber and canvas, Octopatches’ patch styles cover a wide range of facings, each tested with compatible backings.
- Optional corner stitching: For high-wear spots or items that will be washed frequently, corner stitching is available as an add-on to reinforce the heat-seal bond.
Pro Tip: Request a sample pack and run your own wash test before placing a production order. Five to ten wash cycles on the actual garment fabric will tell you everything you need to know about adhesive performance.
Your pre-order checklist for heat-applied patches
Before you place an order, confirm these details to avoid costly surprises:
- Garment fabric: Identify the exact fabric (cotton, polyester, nylon, leather, coated shell). This determines which backing is safe to use.
- Washing expectations: Will the item be washed at home, commercially, or rarely? High-wash items need commercial heat-seal or sew-on.
- Application method: Do you have a heat press, or will end customers apply patches with a household iron? This affects which backing to specify.
- Sample pack: Always request one before a full production run.
- Artwork format: Upload vector files (AI, EPS, or high-resolution PDF) for the cleanest results. Use Octopatches’ design setup service if your files need conversion.
- Backing and heat settings: Confirm the recommended temperature, time, and pressure for your chosen backing with Octopatches before pressing.
- Corner stitching or sew-on option: Request this for high-wear items, curved surfaces, or any patch that will be applied to a fabric where adhesive alone may not hold long-term.
- Spare patches: Order extras. Patches can be damaged during application or wear, and having spares on hand saves a reorder.
Tell your vendor about any coated or laminated fabrics, curved surfaces like hats, and whether patches will be applied by end customers or in-house production staff. That context changes the backing recommendation.
Octopatches makes custom heat-applied patches easy to order and test
Custom patches with commercial heat-seal backing, no minimum order, and a sample pack option: that’s the combination that removes the guesswork from adhesive selection for designers and small brands. You don’t have to commit to a large run before you know the backing works on your specific garment.
Octopatches offers custom patches in faux leather, denim, carbon fiber, canvas, camo, and more, all with commercial heat-seal backing as standard. You can compare materials and backing options on the compare styles page, review application settings on the instructions page, and get your artwork production-ready with the professional design setup service. Start with a sample pack, run your wash test, and scale up when you’re confident in the result.
Sources
- Adhesive Backing for Patches: How to Choose, Apply, and Maximize Durab – MaggieFrameStore
- Embroidered Patch Backing Comparison: A Beginner’s Practical Guide
- A Buyer’s Guide to Custom Iron On Patches
- How to Make Iron-On Embroidered Patches That Last