

Getting your patch accepted and produced correctly comes down to a short list of non-negotiables: submit vector artwork (AI, EPS, SVG, or PDF), set your file at the final stitched size, keep critical elements inside the safe area, use minimum 4–5 mm text height, call out thread colors by Pantone or thread number, specify your border type and backing, and include a 1:1 PDF proof with every upload.
Here’s a quick gate-check you can run before submitting any file:
- File format: Vector (AI, EPS, SVG, PDF) preferred; raster PNG/JPG/TIFF at 300 DPI at final size if vector isn’t available
- Artwork size: Set at the exact final stitched dimensions, not screen size
- Safe area: Keep all key elements within a safe margin inside the border edge
- Text height: Minimum 4–5 mm for embroidered text; convert all fonts to outlines
- Line thickness: No strokes thinner than 1.5–2 mm for embroidery
- Color callouts: Pantone codes or thread color numbers, not color names
- Border type: Specify merrow, heat-cut, or laser-cut
- Backing: Specify iron-on, Velcro, adhesive, or sew-on
- Proof: Include a flattened 1:1 PDF preview alongside your editable file
Pro Tip: The single change that prevents the most rejections is supplying a vector file alongside a flattened 300 DPI raster at the exact final size. Vendors who receive both can digitize immediately without back-and-forth.
Key Takeaways
Submitting production-ready patch artwork requires vector files at final size, Pantone color callouts, a 1:1 PDF proof, and clear notes on border type and backing before your files go to production.
| Point | Details |
|---|---|
| Vector files first | Submit AI, EPS, SVG, or PDF; raster files must be 300 DPI at the exact final stitched size. |
| Text and line minimums | Keep embroidered text at 4–5 mm minimum height and line strokes at 1.5–2 mm minimum thickness. |
| Color callouts required | List every color by Pantone code or thread number; color names cause mismatches at production. |
| Safe area and border | Keep all key elements at least 2–3 mm inside the border edge; specify merrow, heat-cut, or laser-cut. |
| Octopatches design setup | Octopatches offers professional artwork conversion, 3D puff mapping, and no-minimum custom patch orders. |
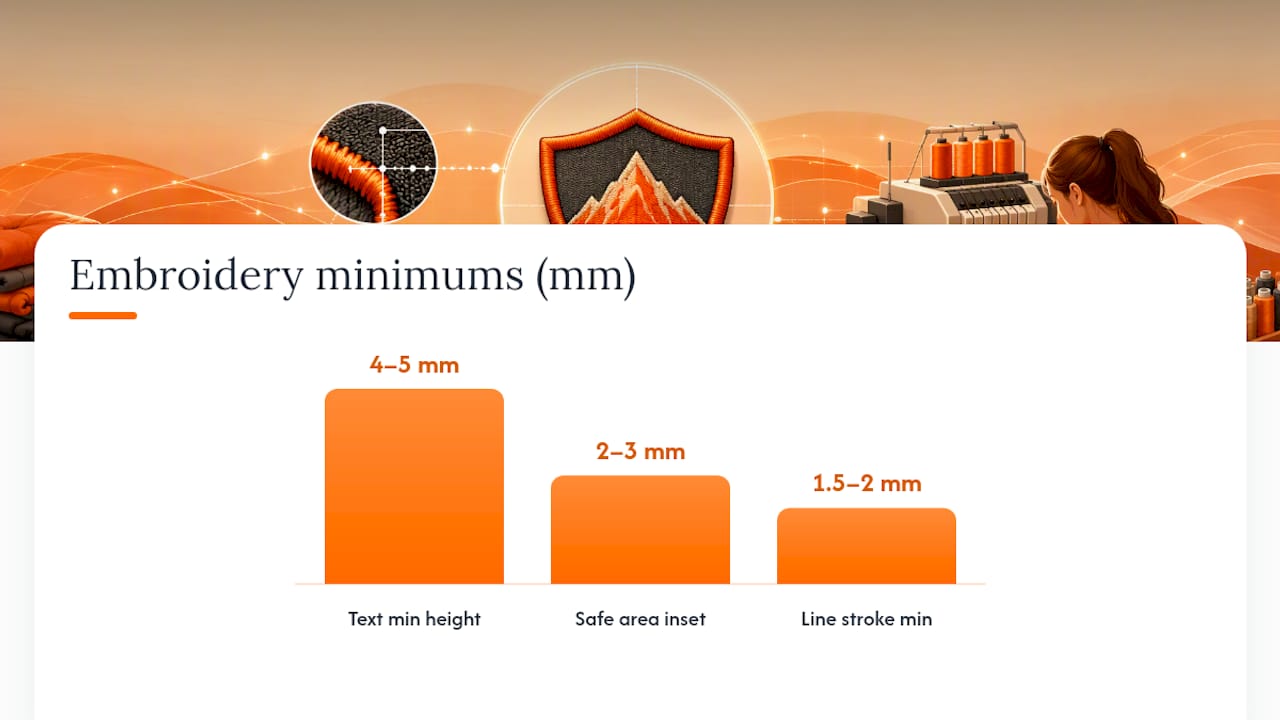
Table of Contents
- How to specify patch size and set up your artwork correctly
- Which file formats give you the cleanest results
- How to use templates and mark orientation in your files
- What border and backing choices mean for your artwork
- What embroidery can and can’t reproduce in your design
- Font and text rules that prevent illegible stitching
- Your step-by-step file submission checklist
- What to expect for proofs, timelines, and costs
- Heat-applied vs. sewn patches: which is right for your project?
- Ready to create your custom patch with Octopatches?
- Sources
How to specify patch size and set up your artwork correctly
“Size” in patch production always refers to the final stitched dimensions, not the dimensions of your artwork canvas. A common mistake is designing at 8.5" × 11" and expecting the factory to scale it down. Supply your artwork at the actual finished size whenever possible.
Common size categories and what they mean for production:
- Micro (under 1"): Extremely limited detail; avoid fine text and thin lines entirely
- Small (1"–2"): Simple shapes and bold text only; 1–2 colors recommended
- Standard (2"–4"): The most flexible range; handles moderate detail and up to 6–8 colors
- Large (4"+): More room for detail, but stitch count increases cost significantly
For a 2.5" circular patch, place your main artwork centered with at least 2 mm of clear space between the design edge and the border stitch line. That buffer is your safe area. The border itself (merrow or heat-cut) sits outside that margin, so anything you want fully visible must stay well inside it.
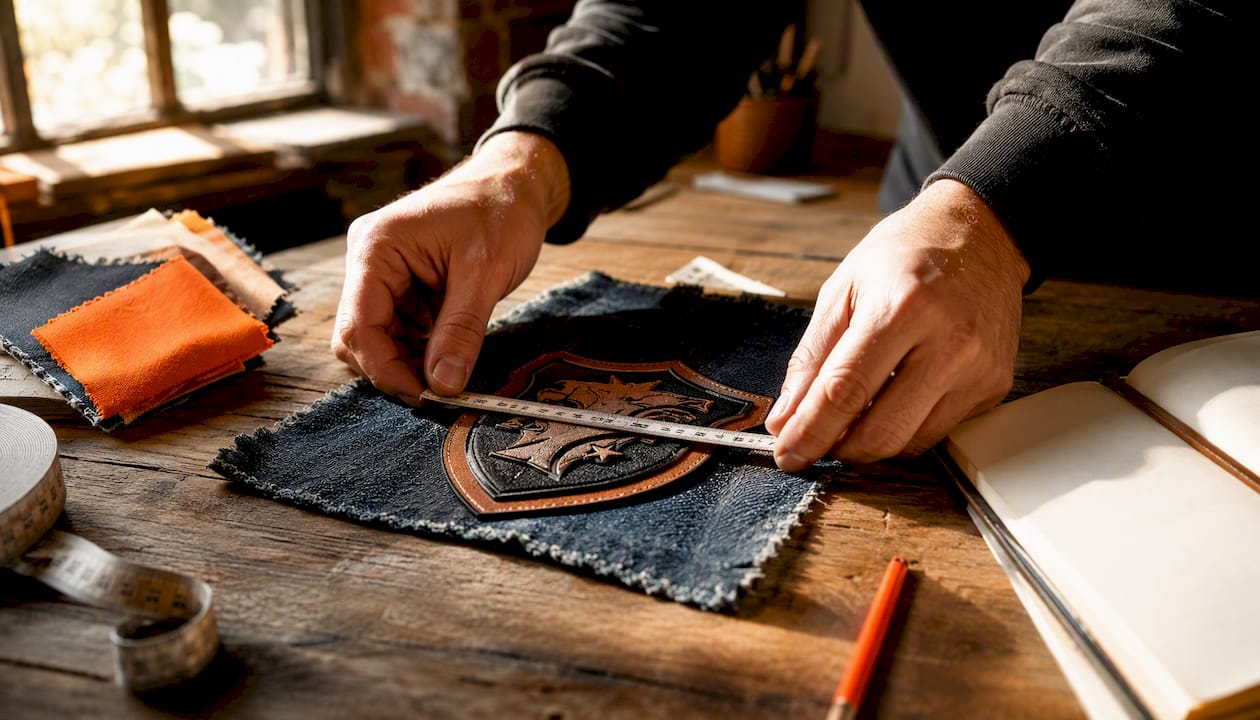
Measure your patch width at its widest point and height at its tallest. For non-rectangular shapes, note both dimensions and the shape name (circle, shield, chevron) in your file notes.
Which file formats give you the cleanest results
Vector artwork (AI, EPS, SVG, PDF) is the preferred format for custom patch production because vectors scale to any size without losing edge quality. When a digitizer traces your design to create stitch paths, clean vector paths mean less manual cleanup and a more accurate final patch.
Vector formats to submit:
- AI (Adobe Illustrator): Best option; keeps layers and editability intact
- EPS: Universally compatible with most digitizing software
- SVG: Good for web-native designs; confirm paths are expanded and not clipped
- PDF: Acceptable when exported from Illustrator or similar with embedded vectors
When you only have raster files:
- Submit PNG, JPG, or TIFF at high resolution and appropriate size
- A 2.5" patch needs a raster file that is 750 × 750 pixels minimum (at 300 DPI).
- Never submit a web-resolution image (72–96 DPI) and expect it to scale up cleanly
- Avoid JPEG compression artifacts on logos with sharp edges
Every file you send should include outlined text (no live fonts), a flattened preview layer, and your editable vector when available. Professional setup services typically request both an editable vector and a flattened 1:1 PDF proof to speed proof approvals and reduce design cleanup time before digitizing.
How to use templates and mark orientation in your files
Orientation errors are one of the most avoidable production problems. A patch sewn upside-down on a jacket is a costly mistake that a single label in your file prevents.
- Download and use vendor templates: Industry suppliers provide templates and dielines matched to their cutting and border processes. Working inside a vendor template guarantees your artwork is at the correct scale and that your safe area aligns with their machine tolerances.
- Mark your top: Add a text label (“TOP”) or a directional arrow on a non-printing layer. This is especially critical for asymmetric designs or patches that will be sewn at an angle on a garment.
- Include a dieline: The dieline is the cut path that defines the patch shape. Keep it on a separate, clearly labeled layer so the factory doesn’t mistake it for artwork.
- Export a 1:1 PDF proof: Before uploading, export a PDF at 100% scale and print it. Hold it against the garment or surface where the patch will go. If it looks right at actual size, you’re ready.
A professional tech pack should include a 1:1 scale vector technical drawing, side-profile views for textured patches (especially chenille or 3D raised effects), exact border thickness in millimeters, thread color callouts, backing type, and application notes. For 3D puff or chenille patches, supply a side-profile sketch showing the height and shape of raised areas so the factory understands the intended depth.
What border and backing choices mean for your artwork
Your border type changes where your artwork can safely sit, and your backing affects how the patch attaches. Both decisions need to be made before you finalize your file.
Border types:
- Merrowed border: A classic wrapped edge created by an overlock stitch. Works best on simple shapes (rectangles, circles, ovals). Merrowed borders wrap the edge and suit simple shapes, while heat-cut or laser-cut borders follow complex silhouettes; each border type requires a specified margin from the artwork. Keep artwork at least 3–4 mm inside a merrowed edge because the stitch wraps inward slightly.
- Heat-cut/laser-cut border: Follows any shape, including jagged edges, stars, and custom silhouettes. Requires a safe bleed margin between artwork and the cut line.
- Die-cut: Similar to laser-cut in precision; used for very detailed custom shapes.
Backing options and what they affect:
- Iron-on (heat-activated adhesive): The most common for retail and DIY; works on cotton, polyester, and blends. Thicker backings add slight stiffness.
- Velcro/hook-and-loop: Adds height and weight; great for removable patches on tactical gear or bags. Specify hook side vs. loop side.
- Adhesive (peel-and-stick): Temporary; best for paper, packaging, or short-term applications.
- Sew-on: No backing adhesive; relies entirely on stitching for attachment. Lightest option.
Pro Tip: For complex silhouettes with sharp points or tight curves, always choose heat-cut or laser-cut over merrow. A merrowed stitch can’t follow a tight inside corner without puckering, which distorts the edge of your design.
What embroidery can and can’t reproduce in your design
Embroidery is a physical process. Thread has width, needles have size, and those physical constraints set hard limits on what your artwork can include.
Minimum dimensions:
- Line thickness: No thinner than a certain minimum thickness for a clean embroidered stroke. Thinner lines may drop out entirely or merge with adjacent stitches.
- Text height: A safe minimum is 4–5 mm for reliable legibility; smaller text may require woven or printed solutions to remain readable.
Stitch types and when they’re used:
- Satin stitch: Parallel stitches that create a smooth, shiny surface; used for outlines, borders, and text
- Fill stitch (tatami): A grid-like pattern that covers large areas evenly; used for backgrounds and solid shapes
- Running stitch: A single line of stitches; used for fine details, outlines on small elements, and underlay
Gradients and photographic detail translate poorly to thread. Embroidery works in solid color blocks. When a design includes a gradient, the digitizer has to approximate it with color blending or step shading, which rarely matches the original. Heat transfer printing handles gradients and photographic detail better than embroidery; for those effects, supply high-resolution raster art at 300 DPI and expect some color-matching differences versus on-screen colors.
Common problem designs and their fixes:
- Micro-text under 4 mm: Switch to woven patch or increase font size
- Thin script outlines: Convert to a bolder weight or use a printed transfer
- Photographic faces or textures: Use heat-transfer or sublimation, not embroidery
Providing clean, simplified artwork reduces manual cleanup and redesign time before digitizing, which directly affects your turnaround time and setup cost.
Font and text rules that prevent illegible stitching
Text is where most patch designs run into trouble. A font that looks sharp on screen can become an unreadable blob when stitched at small sizes.
- Convert all text to outlines before submitting. This prevents font-substitution errors if the vendor’s software doesn’t have your typeface installed. Keep a copy of the editable text layer in a separate backup file for proofing reference.
- Minimum character height: 4–5 mm for embroidery; below that, letterforms close up and become illegible. For woven patches, you can go slightly smaller.
- Font style: Bold, simple sans-serif fonts (think Futura Bold, Impact, or similar) and slab serifs stitch cleanly. Hairline scripts, thin serifs, and tightly tracked all-caps are high-risk choices at small sizes.
- Letter spacing: Slightly open tracking helps individual letters stay distinct after stitching. Tight or negative tracking causes letters to merge.
- Line spacing: Leave enough room between lines of text that descenders and ascenders don’t overlap when stitched.
Pro Tip: For curved text on circular patches, convert the text to outlines and manually adjust letter spacing after curving. Auto-curved text often creates uneven gaps that look worse when stitched. If the wording is long, consider shortening it or breaking it into two shorter arcs.
Your step-by-step file submission checklist
Follow this sequence every time you prepare files for a patch vendor. It eliminates the most common reasons for delayed proofs.
- Finalize your vector artwork in AI, EPS, SVG, or PDF format. Confirm all paths are closed and shapes are filled correctly.
- Outline all text. Type > Create Outlines in Illustrator, or the equivalent in your software.
- Separate your layers clearly: artwork on one layer, dieline/cut path on another, orientation marks on a third (set to non-printing).
- Export a 1:1 PDF proof at 100% scale with all artwork visible and the dieline shown.
- Export a 300 DPI raster (PNG or TIFF) at the exact final stitched size if the vendor requests it alongside the vector.
- Add color callouts. List every color with its Pantone code or thread color number in a text note on the file or in a separate document. Never rely on color names like “navy blue.”
- Note your border type and backing in the file or order notes: “Merrow border, iron-on backing” or “Laser-cut, Velcro hook side.”
-
Name your files clearly: use a format like
BrandName_PatchName_v1_FINAL.aiandBrandName_PatchName_v1_PROOF.pdf. Avoid spaces and special characters in filenames. - Zip all files together and include a brief text document listing the contents, your contact info, and any production notes.
- Double-check patch size one more time before uploading. Confirm the dimensions match your order.
What to expect for proofs, timelines, and costs
Once your files are submitted, here’s how the typical production workflow unfolds:
- Digital mockup: The vendor creates a visual proof showing your design on the patch shape. Review it carefully for color accuracy, text legibility, and element placement.
- Digitizing: Your artwork is converted into a stitch file. This is where stitch types, density, and underlay are set. Clean artwork speeds this step considerably.
- Optional physical sample: For new designs, complex materials, or 3D effects, ordering a physical sample before full production is worth the extra time. It’s the only way to confirm thread colors, texture, and attachment method in person.
Common cost drivers:
- Patch size (larger = more stitches = higher cost)
- Stitch count and density
- Border complexity (laser-cut costs more than merrow)
- Backing type (Velcro adds cost vs. iron-on)
- Specialty materials (faux leather, PVC, chenille)
- Number of colors
Octopatches offers no-minimum custom patch orders and professional design setup services, which means you can order a single patch to proof a new design without committing to a large run. For new materials or 3D effects, the OctoPatches sample pack lets you check texture, color, and heat-application feel before going into full production.
Heat-applied vs. sewn patches: which is right for your project?
Choosing between heat-applied and sewn patches affects your artwork expectations, your timeline, and how the finished patch performs on the garment.
Heat-applied patches:
- Fast application with a heat press; no sewing required
- Practical for retail and low-volume runs; broad material compatibility
- Work well on cotton, polyester, canvas, and most blends
- Ideal for faux-material finishes (leather look, denim, carbon fiber) that can’t be sewn through easily
- Durability varies by fabric and wash frequency; follow heat-application instructions for best results
- Best for: retail products, branded merchandise, apparel decorators, and small businesses
Sewn patches:
- Stitched directly onto the garment; more permanent attachment
- Better for heavy-use applications like uniforms, tactical gear, and workwear
- Structured merrowed edge holds its shape through repeated washing
- Requires a sewing machine or hand-stitching; adds labor time
For your artwork: heat-applied patches using faux materials like leather or denim often show more surface texture than embroidered patches, so bold, high-contrast designs translate best. Avoid designs that rely on fine line detail at small sizes. Suppliers recommend solid color blocks, bold typography, and simplified linework for the cleanest results on textured faux materials.
Pro Tip: When ordering heat-applied patches with 3D raised effects, specify which areas of your design receive the foam layer on a color-coded artwork file. A side-profile sketch showing foam height prevents misinterpretation and saves a proof revision cycle.
What Octopatches’ design team has learned from real production
A few things that don’t show up in generic artwork guides but matter in practice:
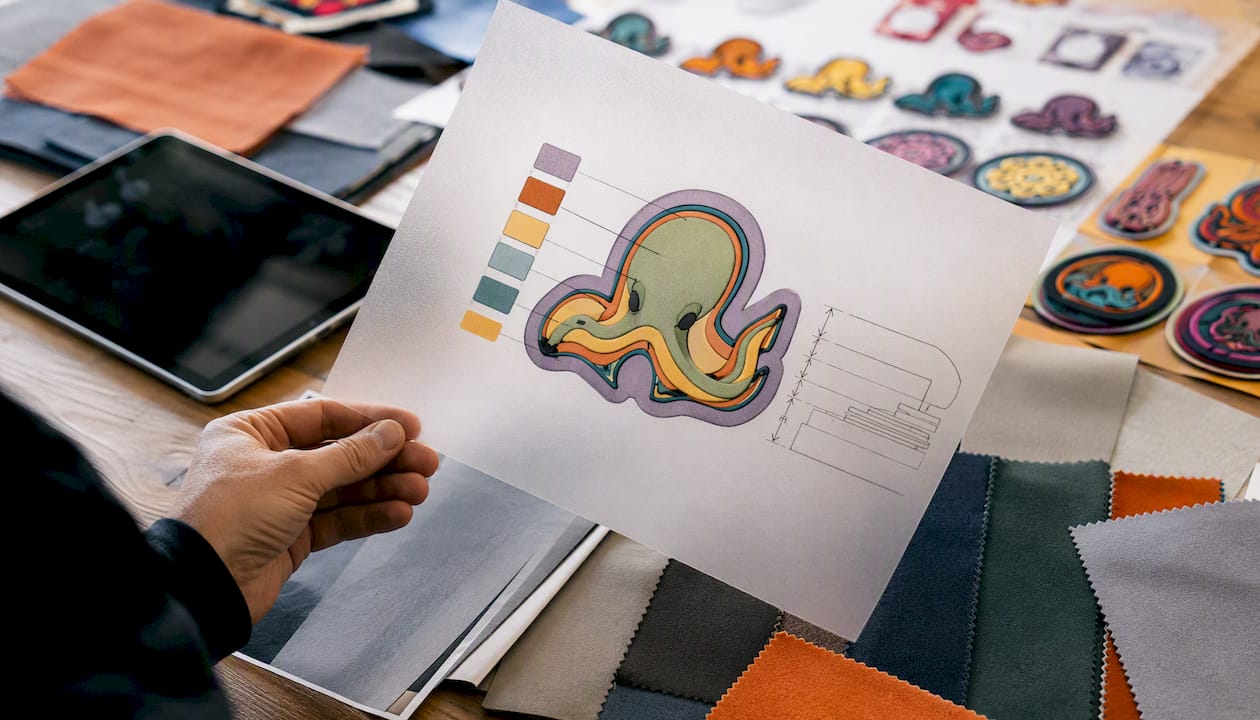
- Map your 3D areas explicitly. If you want a raised logo center with a flat border, color-code the artwork: one color for flat areas, another for 3D. Don’t assume the factory will guess. Octopatches’ 3D flex setup walks you through exactly how to indicate foam zones.
- Thread-to-Pantone mapping saves a proof cycle. Instead of sending a Pantone color and hoping the thread match is close, ask for the thread color number that most closely matches your Pantone before approving the digital proof. Approve the thread match first, then the stitch proof.
- Side profiles for chenille and raised patches are non-negotiable. A flat top-view drawing tells the factory nothing about intended height. A simple hand-drawn side sketch is enough.
- Version your files. The most common cause of proof delays is a vendor working from an old file. Name every revision with a version number and confirm which file is current in your submission notes.
Ready to create your custom patch with Octopatches?
You’ve done the hard work of preparing your artwork. Now you need a production partner that won’t add friction to the process. Octopatches specializes in custom heat-applied patches with no minimum order, which means you can submit a single design and get a production-quality patch back without committing to a bulk run.
The professional design setup service covers artwork conversion, color mapping, and 3D puff zone mapping for designers who want to hand off the technical prep. Faux-material finishes in leather, denim, carbon fiber, canvas, and more are available without the limitations of traditional embroidery. Submit your files through the submission instructions page, or order a sample pack first to feel the materials in hand before placing your full order.
Sources
These resources give you deeper technical detail on the specs covered above:
- Creating a Tech Pack for a Custom Patch: My Expert Guide for Brands (2026)
- Custom Patch Artwork Requirements for Clean Patches
- Stahls’ (manufacturer resource) — Heat/Border/Edge guidance
- Ted Stahl (industry design and setup guidance)