

Center your patch on the front panel, roughly 1 to 1.5 inches above where the panel meets the visor, and keep it clear of seams. That single move solves most placement questions before they start.
For quick reference:
-
Snapback or flatbill: front center, about 1.25 inches above the visor seam.
-
Curved brim or dad hat: front center, slightly lower, closer to 1 inch above the seam.
-
Trucker hat: front foam panel, centered, avoiding the mesh transition.
-
Beanie: lower front or a small side placement, sized down to avoid stretching.
Pro Tip: When in doubt, place the patch, don’t attach it yet, and try the hat on. Five seconds in a mirror catches misalignment no ruler will.
Key Takeaways
Accurate patch placement on hats comes down to measuring from fixed points, centering on the front panel, and matching patch size to panel proportions.
| Point | Details |
|---|---|
| Default placement | Center the patch on the front panel, 1 to 1.5 inches above the visor seam. |
| Size to panel width | Keep patch width to 60 to 75 percent of the visible front-panel width for legibility. |
| Use fixed measuring points | Measure from both side seams and the visor edge, never by eye alone. |
| Match tool to volume | Use a template or centering guide for batches; a cap plate prevents puckering on curved presses. |
| OctoPatches for heat-apply | OctoPatches offers no-minimum, heat-applied custom patches with instructions matched to this placement workflow. |
Table of Contents
- Patch Placement on Hats: A Cheat Sheet by Style
- What Tools Make Patch Placement Repeatable?
- How Do You Measure, Mark, and Attach a Patch Step by Step?
- Sewing, Heat, Adhesive, or Rivets: Which Attachment Method Fits?
- How Big Should a Patch Be for Good Legibility?
- What Do Official Uniform Placement Rules Look Like?
- OctoPatches Maker Tips for Heat-Applied Patch Placement
- Sewn or No-Sew: Which Fits Your Hat Project?
- Get Your Patches Placement-Ready With OctoPatches
- Sources
Patch Placement on Hats: A Cheat Sheet by Style
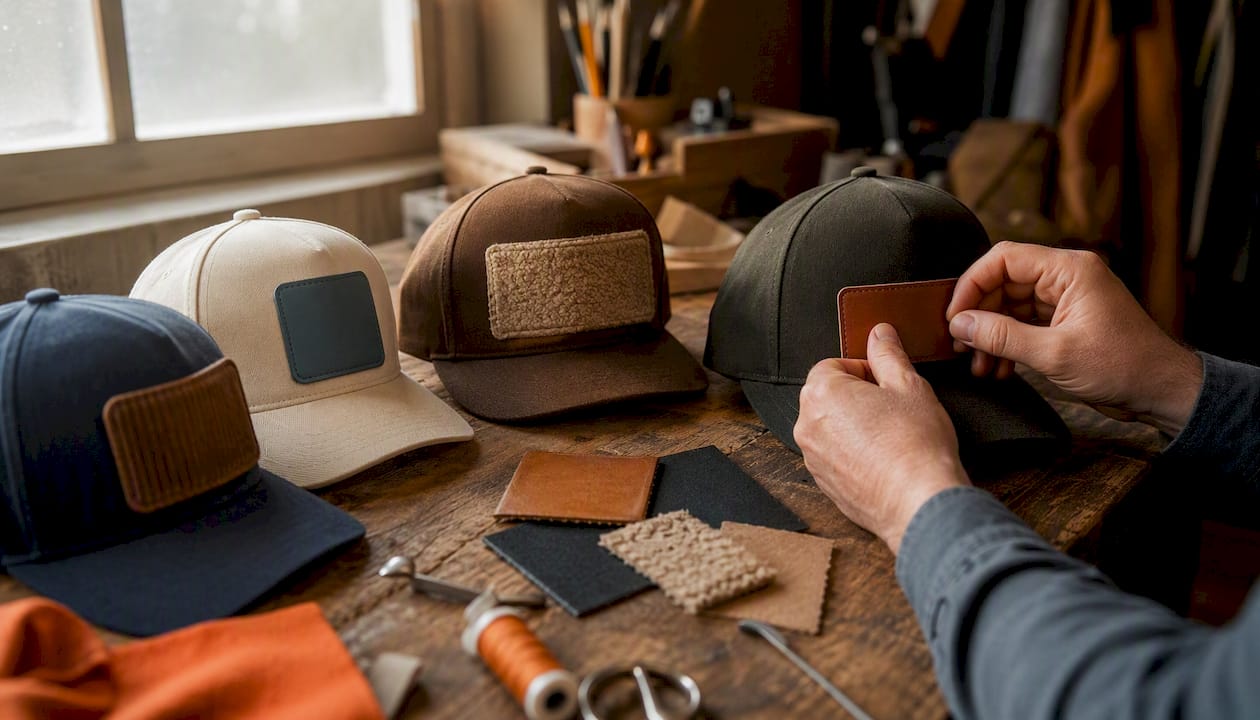
Structured caps like snapbacks and flatbills have a rigid front panel, so patches read best placed high and centered, generally 1 to 1.5 inches above the visor seam. Curved-brim hats and dad hats have a softer, more rounded front panel, which pulls the sweet spot down slightly, closer to the seam, so the patch doesn’t warp when the crown flexes.

Trucker hats are the outlier. Their foam front panel is small and often curved, so you want the patch centered on the foam itself, not bridging into the mesh back. Beanies have no structure at all, which means smaller patches placed lower on the front (or off to one side) hold their shape better than anything centered and large.
As a rule of proportion, keep patch width to a moderate portion of the visible front-panel width. Go wider and it looks like it’s spilling off the edges. For hats overall, a single patch centered on the front panel is the cleanest choice, since seams, curves, and high-friction zones near the brim cause the most visible distortion.
What Tools Make Patch Placement Repeatable?
Eyeballing works fine for one hat. It falls apart on the tenth. Once you’re producing more than a couple of pieces, a few low-cost tools turn placement from guesswork into a repeatable process:
- Patch alignment templates (a Patch Ruler™ or similar guide): clear plastic rulers marked with center lines and inch gradations, laid directly on the panel to mark exact placement before you commit.
- Centering guides like Laserhyde’s hat alignment tools (Hat Mat, alignment weights, or a Patch Ruler™ Guide Kit): these hold the patch steady against the panel while you check symmetry from multiple angles.
- Tailor’s chalk or a fabric-safe pencil: for marking your reference points without leaving permanent residue.
- A cap heat press or cap plate: curved, contoured presses built specifically for caps apply even pressure across a rounded surface, which a flat press simply can’t do.
Templates matter more the moment you move from a single hat to a batch. One template, reused across 20 hats, keeps every patch landing in the identical spot.
Pro Tip: Cut a placement window out of cardstock sized to your patch, punch a small hole at true center, and mark that center point on every hat with chalk before you ever pick up the patch. It costs nothing and it’s more consistent than most $30 kits.
How Do You Measure, Mark, and Attach a Patch Step by Step?
Getting patch placement right is a sequence, not a single decision. Skip a step and the error shows up after the patch is already attached, which is the expensive way to learn.
- Pick your style and size using the cheat-sheet above, then decide on sewing or heat application based on the hat’s material.
- Prep the hat. Give it a light steam or shape it on a block if it’s been packed flat, and insert an inner support (a rolled towel or hat form) to keep the front panel taut.
- Measure and mark. Find the panel’s true center by measuring from both side seams, then measure up from the visor seam to your target height. Mark the center point and one reference edge with chalk.
- Align before you attach. Use a temporary tack, painter’s tape, or a dot of removable glue to hold the patch in place, then check it against a mirror or head form from a few feet away.
- Attach. Sew around the perimeter with a straight or zigzag stitch, or set the heat press to the patch’s specified temperature and dwell time for heat-apply patches.
- Finish. Trim loose threads, let heat-applied patches cool undisturbed for a minute before flexing the panel.
- Crooked placement: almost always traced back to measuring from one seam instead of both. Always split the difference between left and right.
- Puckering: usually means uneven heat-press pressure on a curved panel. A cap plate fixes this more often than a flat press ever will.
Sewing, Heat, Adhesive, or Rivets: Which Attachment Method Fits?
Each attachment method trades off durability, appearance, and equipment cost differently, and the right pick depends on what the hat is actually for.
- Sewing: the most durable option and the standard for premium retail and uniforms, but it’s slow and requires a machine that can handle a curved cap frame.
- Heat application: fast, no sewing skill required, and ideal for small batches or promotional runs, though it needs a press capable of even, consistent heat.
- Adhesive backing: the quickest for one-off projects, but bleed-through and reduced wash durability make it a poor fit for anything meant to last.
- Rivets or snaps: best for heavy hardware-style patches on leather or canvas, rare on soft caps, and mostly seen on rugged workwear.
Leather and PVC patches tolerate heat well and sew poorly (needles tear the material), while woven and embroidered patches handle both stitching and moderate heat without issue.
How Big Should a Patch Be for Good Legibility?
Size and shape decide whether a patch reads clearly from across a room or gets lost on the panel. As a starting rule, keep patch width between 60 and 75 percent of the visible front-panel width, and make sure any text or fine detail is large enough to hold up at a few feet of distance, not just up close.
Round patches read as centered even when placed slightly off true center, which gives you a little forgiveness. Rectangular patches are far less forgiving. A quarter inch of misalignment on a rectangle is obvious in a way it never is on a circle.
Before you commit to a final attachment, run a simple visual test: photograph the hat at arm’s length, or set it on a head block and step back. If the patch design or lettering gets hard to read at that distance, size it up, since structured caps read better with patches placed slightly higher and closer to the visor edge, while soft caps favor smaller, lower placement to avoid distortion.
What Do Official Uniform Placement Rules Look Like?
Military and uniform specifications treat patch placement as measured geometry, not aesthetics. The precision is worth studying even if you never need to hit it exactly.
Civil Air Patrol guidance centers a commander insignia exactly 1/2 inch above the name tape on a 1-inch by 1-inch patch, and a separate flight cap device is specified at 1.5 inches from the edge, centered on the left side.
These figures apply strictly to those uniforms and that organization. Treat them as a reference for precision, not a rule to copy onto a fashion cap.
OctoPatches Maker Tips for Heat-Applied Patch Placement
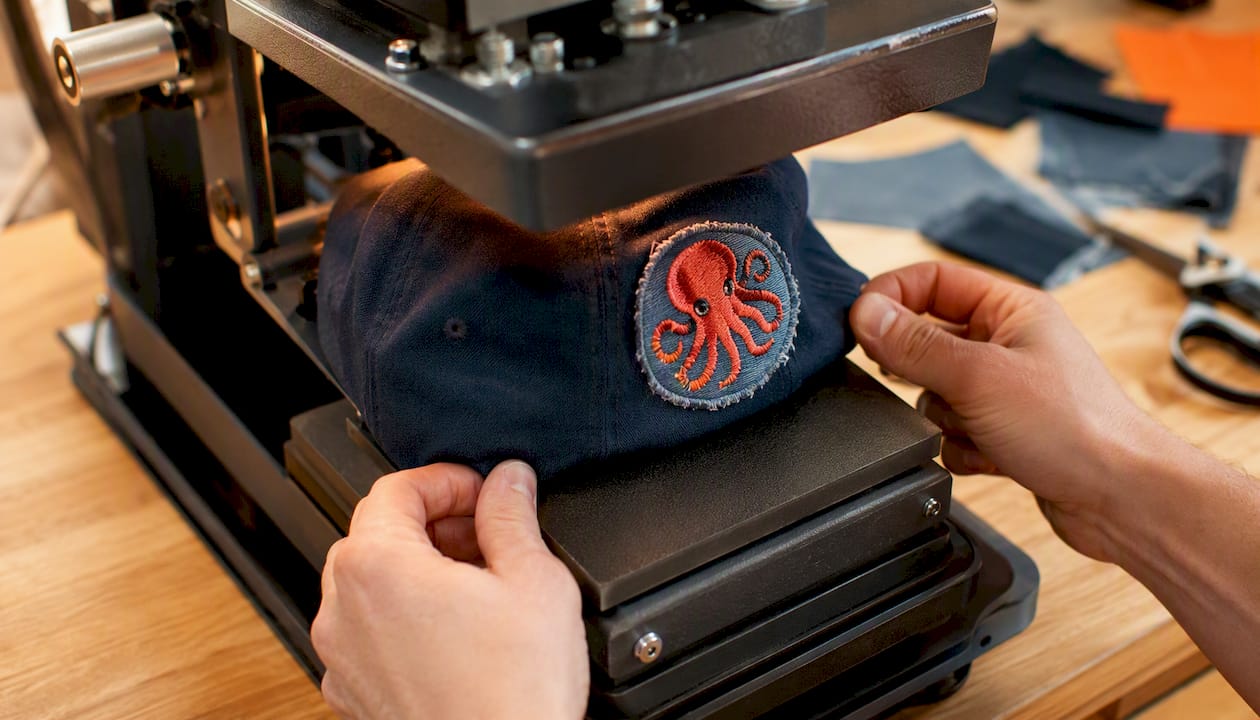
A cap plate solves more heat-apply problems than any other single tool. Its curved, contoured surface distributes pressure evenly across a rounded panel, which a flat clamshell press can’t replicate, and that even pressure is what prevents the puckering that ruins an otherwise well-placed patch.
- Choose backing based on wear: a heavier backing survives regular washing better than a thin one.
- Prevent adhesive bleed by using the exact temperature and dwell time specified for your patch material rather than guessing high.
- Tack before you press. A quick low-temp tack holds the patch still through final positioning, so a shift mid-press doesn’t ruin the run.
- For small batches, tack one hat at a time rather than pre-tacking a whole stack. It’s slower per unit but catches misalignment before it multiplies.
Full attachment instructions and material-specific guidance are worth reviewing before your first production run.
Sewn or No-Sew: Which Fits Your Hat Project?
Sewing gives a premium, tactile edge that reads as higher-end, which matters for retail hats customers pick up and inspect. Heat-apply skips the machine entirely and gets a batch of hats finished in an afternoon, which matters more for fast turnarounds and promotional runs. The decision rule is simple: sew when the hat itself is the product, heat-apply when speed and washability testing matter more than a stitched edge.
Get Your Patches Placement-Ready With OctoPatches
Getting placement right only matters if the patch itself holds up, and that’s where a heat-applied custom patch changes the math. OctoPatches builds patches in faux leather, denim, carbon fiber, and a dozen other textures, with no minimum order standing between you and a single test hat or a full production run.

Every patch ships ready for the cap-plate workflow covered above, and the instructions page walks through spacing and alignment for your exact material choice. If your artwork isn’t production-ready yet, the professional design setup service converts it for you before it ever reaches the press. When you’re ready to move from cheat-sheet to finished hat, order a custom patch sized to the placement you’ve already mapped out.
Sources
- Patch Placement Guide: Where to Put Patches on Gear That Actually Works
- CAPR 391 (Civil Air Patrol uniform regulations)
- UNIFORM_GUIDE_0DAD142990326.pdf