

Press without sewing means applying specially made heat-activated custom patches with a heat press or iron, and when you do it right, the bond holds up to retail-level washing and wear. These patches use hot-melt adhesives like EVA (ethylene-vinyl acetate) or polyolefin, which liquefy under heat and grip the fabric fibers as they cool.
When it works well: cotton, cotton blends, heavy denim, and mid-weight knits all take heat-applied patches with confidence. When it gets risky: silk, high-elastane activewear, and some faux leathers need lower temps, shorter dwell times, or a different approach altogether.
Here’s the production-level detail most guides skip: pressing from both sides, using a bottom-heated platen or a quick flip-and-back-press, cuts your dwell time and gets more even adhesion, according to Transfer Express’s technical guidance. That single trick separates a shop that gets consistent results from one that’s guessing every time.
- Most patches bond between 230°F and 356°F, depending on the adhesive and fabric type.
- A practical starting range for many embroidered and heat-transfer patches is 320°F to 350°F for 15 to 25 seconds, per Raccoon Transfers.
- OctoPatches backs every order with application instructions so you’re not left figuring out settings on your own.
Key Takeaways
Heat-applied patches bond reliably to cotton, denim, and mid-weight knits when temperature, dwell time, and pressure match the fabric and patch material.
| Point | Details |
|---|---|
| Best fabric matches | Cotton, cotton blends, and heavy denim take heat-applied patches most reliably. |
| Two-sided heat wins | Pressing or back-pressing from both sides cuts dwell time and improves adhesion on thick items. |
| Test before a full run | Run a sample press on your exact fabric and log settings before committing to production. |
| Cure time protects the bond | Wait 24 hours after pressing before the first wash to let the adhesive fully set. |
| Order through Octopatches | Octopatches ships no-minimum samples across faux leather, denim, and carbon fiber textures with professional design setup available. |
Table of Contents
- What Does It Mean to Press a Patch Without Sewing?
- Which Fabrics and Patch Materials Actually Bond Well?
- What Equipment Do You Need to Get This Right?
- How Do You Apply a Patch Step by Step?
- How Do You Handle Hats, Seams, and Other Tricky Spots?
- Why Do Patches Peel, Bubble, or Scorch (and How Do You Fix It)?
- How Should You Wash and Care for a Heat-Applied Patch?
- Why Heat-Applied Patches Are the Right Bet for Small Brands
- Ready to Order Samples or Start Your Design?
- Frequently Asked Questions
- Sources
What Does It Mean to Press a Patch Without Sewing?
A heat-applied patch is built with a backing layer of hot-melt adhesive fused to the underside of the patch during manufacturing. Press it against fabric with enough heat and pressure, and that adhesive melts, seeps into the weave, and cures into a bond as it cools. No needle, no thread, no puckered stitch lines.
The patch itself can be embroidered, woven, PVC, silicone, faux leather, or a raised 3D polyurethane construction. Each material behaves a little differently under heat. Embroidered patches with a hot-melt backing are the most forgiving. PVC and silicone need gentler handling because they can distort or bubble if you push the temperature too high. Faux leather patches, like the ones OctoPatches produces in denim, wood grain, and carbon fiber textures, tend to want moderate heat and a slower, steadier press.
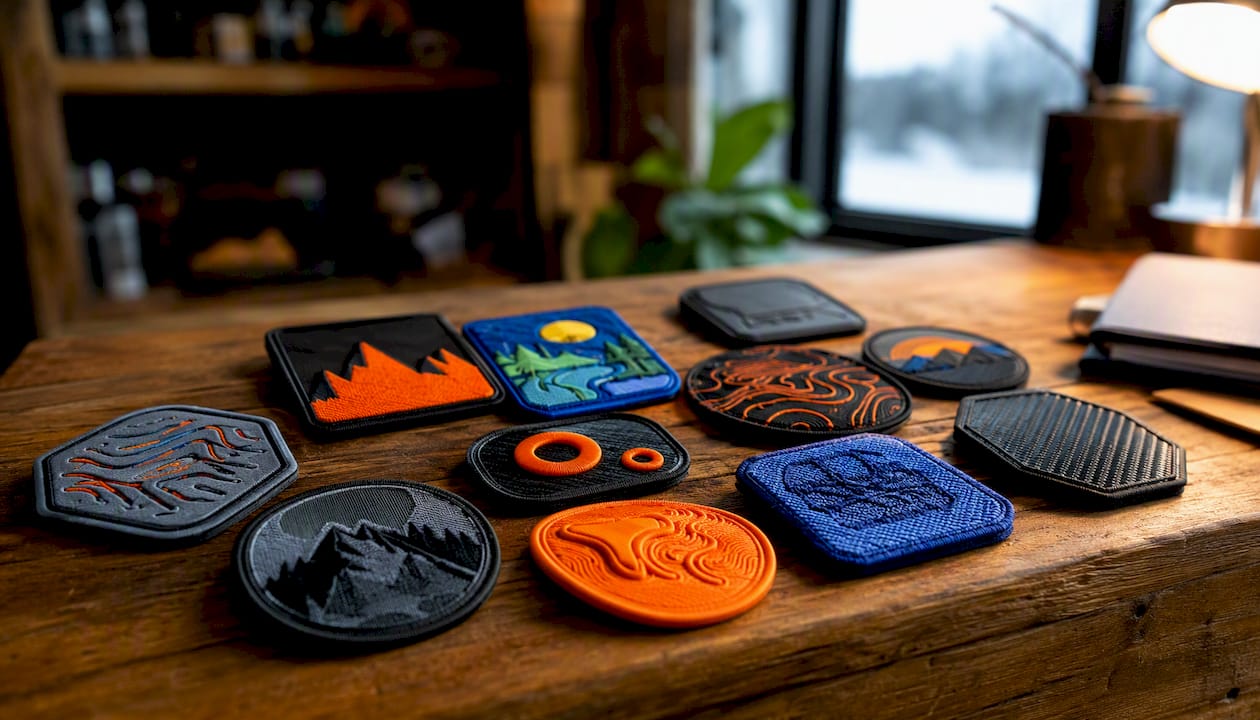
So when should you actually choose this method? Short production runs are the obvious case, since you skip the labor cost of stitching entirely. Small budgets benefit too. Retailers ordering fifty caps for a pop-up don’t want to pay embroidery-machine setup fees for that volume. Brands chasing a clean, seamless look on jacket backs, tote bags, or uniform chest badges also lean toward heat application because there’s no visible stitch border interrupting the artwork.
Skip it, or at least reinforce it, on delicate silk, garments with high elastane content that stretch constantly, and gear that lives outdoors in direct sun and rain for years without a wash cycle to refresh the bond.
Which Fabrics and Patch Materials Actually Bond Well?
Compatibility is where most first-time buyers get tripped up. A patch that presses beautifully onto denim can lift within a week on a poly-blend jersey if you don’t adjust your settings.
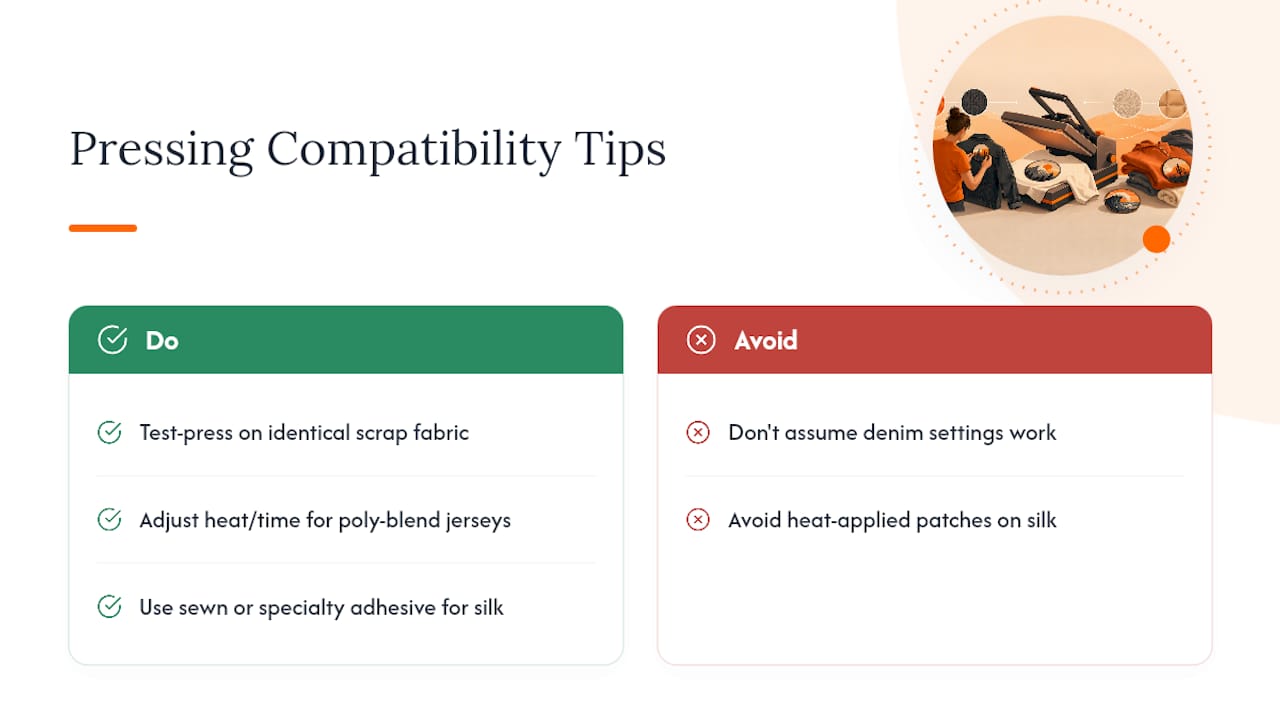
Pro Tip: Always run a test press on a scrap of the exact fabric you’re using before committing to a full batch. Fifteen minutes of testing saves you an entire order of returns.
Silk and other very delicate fabrics generally fall outside this table because heat-applied patches aren’t the right fit for them at all. If your product line touches those materials, plan on sewn attachment or a specialty adhesive built for that fiber.
What Equipment Do You Need to Get This Right?
A household iron can apply a patch in a pinch, but it can’t hold consistent temperature or even pressure across the whole surface, which is exactly why patches applied with an iron peel more often than those applied with a proper press.
For repeatable results, you want:
- A flat heat press, either clamshell or swing-away style, that holds a steady set temperature.
- Pressing pillows to level out seams and uneven surfaces so the patch gets full contact.
- A Teflon sheet or piece of parchment paper between the press and the patch to protect both surfaces.
- Heat-resistant tape to hold the patch in position during the press cycle.
- A hat platen or small hot-shoe attachment if you’re regularly applying patches to curved surfaces like caps.
| Patch Type | Temperature | Time | Pressure |
|---|---|---|---|
| Standard embroidered hot-melt | 320–350°F | 15–25 sec | Medium to firm |
| PVC or silicone | 300°F | 15 to 25 seconds | Light |
| Faux leather / 3D PU | 230°F to 356°F | 15 to 25 seconds | Medium |
| Woven patches | 320°F to 350°F | 15 to 25 seconds | Medium |
Never use steam on a heat-applied patch. Moisture interferes with adhesive activation and is one of the most common causes of a patch that looks fine off the press and then lifts at the corners a day later, according to Bella Badges’ troubleshooting research. Overheating polyester or elastane garments causes a different problem: the base fabric itself can shine, harden, or melt before the adhesive fully cures.
Pro Tip: If you’re pressing a thick item like a denim jacket or a heavy hoodie, flip the garment and press from the inside for a few extra seconds. That bottom-heated approach drives heat through the fabric to the adhesive layer instead of fighting your way through it from the top.
How Do You Apply a Patch Step by Step?
- Inspect the patch backing and artwork for any defects before you start. A flawed patch wastes your press time.
- Pre-press the garment for three to five seconds to remove moisture and flatten wrinkles at the application site, a step Raccoon Transfers recommends as standard shop practice.
- Position the patch and secure it with heat-resistant tape so it doesn’t shift when you close the press.
- Cover the area with a Teflon sheet or parchment paper.
- Apply the press at your target settings from the fabric compatibility table above.
- Let the patch cool fully before handling. Pulling at a warm patch undoes the bond before it sets.
- Test the edges gently once cool. If any corner lifts, repress with slightly more time or pressure.
- For thick garments, flip and press from the back for an additional five to ten seconds.
Before running a full batch, do a proper test press: mark down your settings, note dwell time and pressure, snap a photo of the result, and let it cure for 24 hours before you wash it. That cure window matters more than people expect, since the adhesive keeps strengthening after it leaves the press.
- Keep a fail log noting fabric type, settings used, and outcome.
- Try a gentle pull test on a corner after cooling, not while the patch is still warm.
- Document everything by fabric batch, since dye lots and finishing treatments can shift how a fabric responds to heat.
How Do You Handle Hats, Seams, and Other Tricky Spots?
Flat platens work great on flat garments. Curved and uneven surfaces are a different story.
For caps and hats, use a dedicated hat press or a small conforming platen built for curved surfaces. Two-sided heat helps enormously here, since a curved surface often loses contact pressure on one side during a standard press cycle.
Seams and hems create pressure gaps that a flat platen can’t fill evenly. A pressing pillow or a mini hot-shoe attachment levels the surrounding fabric so the whole patch gets contact, not just the thinner sections.
- Identify the obstruction, whether it’s a seam, zipper, or button, before you position the patch.
- Shift placement a half inch to the side of hardware when the design allows it.
- Use a pressing pillow under seams to raise the fabric to platen height.
- Add a reinforcing stitch on any patch placed near a zipper pull or stress point, since that area sees repeated mechanical flexing that heat bonding alone won’t survive long term.
Why Do Patches Peel, Bubble, or Scorch (and How Do You Fix It)?
Peeling almost always traces back to one of a few root causes: the adhesive never fully melted, the press didn’t apply even pressure, moisture got into the mix, or the fabric itself wasn’t compatible with the adhesive type. Bella Badges’ troubleshooting guide points to insufficient heat or pressure as the most frequent culprits.
- Edge lifting after cooling: raise temperature in small five-degree increments and add five seconds of dwell time before trying a full repress.
- Bubbling under the patch surface: usually trapped moisture or air. Pre-press longer to dry the fabric, then reapply.
- Scorching on the garment or patch: drop the temperature and increase dwell time slightly instead of pushing heat higher.
- Uneven adhesion across a large patch: switch to a firmer pressing pillow underneath or add a back press from the reverse side.
- Failure concentrated at seams: use a mini-platen or hot-shoe to isolate pressure on the raised area.
Pro Tip: Keep a simple reference matrix in your shop: fabric batch, settings used, and outcome. Fabric dye lots and finishes vary more than you’d think, and a five-minute log saves you from repeating the same failed press twice.
How Should You Wash and Care for a Heat-Applied Patch?
Wait a full 24 hours after pressing before the first wash. That cure time lets the adhesive finish setting and dramatically improves long-term hold.
- Wash cold or warm, never hot, and turn the garment inside out to protect the patch surface directly.
- Use a gentle cycle and skip fabric softener, which can weaken the adhesive bond over repeated washes.
- Air dry when possible; if you tumble dry, use low heat only.
- If an edge starts lifting after several washes, a quick repress with a warm iron and a pressing cloth often restores the bond.
Wash-related adhesion complaints show up in a notable share of negative reviews across the patch industry, one seller analysis found, which is exactly why testing before a full production run matters so much. For workwear, outerwear, and anything that gets washed weekly, adding a light reinforcing stitch around the patch edge is worth the extra few minutes. It doesn’t undercut the “no sew” convenience of the initial application. It just extends the life of a patch that’s going to see hundreds of wash cycles over its lifetime.
Why Heat-Applied Patches Are the Right Bet for Small Brands
Designers launching a new apparel line rarely have the luxury of committing to a thousand-unit minimum before they even know if a design sells. That’s the gap heat-applied patches fill. Octopatches builds its entire ordering process around no minimums, so you can order five samples, test them on your actual product, and scale up only once you know the patch holds and the design lands with your customers.
The material range matters just as much as the ordering flexibility. A small brand wanting a faux leather patch, a denim-textured badge, or a carbon-fiber effect for a limited drop doesn’t need to compromise on look just because the run is small. And because artwork setup for heat-applied patches has its own technical requirements, Octopatches offers professional design setup to convert your artwork into a production-ready file, which removes one of the most common points of delay in a first order.
One thing worth remembering: stitching still has a place. Adding a reinforcing stitch around a patch edge on a piece of workwear that’ll get washed every week isn’t a step backward. It’s a smart layer on top of a bond that’s already doing most of the work.
Ready to Order Samples or Start Your Design?
If you’ve read this far, you already know the difference between a patch that lasts and one that peels off in the first wash comes down to material choice, settings, and testing, not luck. Octopatches is built for exactly that process. Order a sample pack first, test it on your actual fabric, and only commit to a full run once you’ve confirmed the bond holds. There’s no minimum order requirement standing between you and that test.
Choosing the right material up front saves you a repress headache later. Octopatches offers faux leather, denim, carbon fiber, wood grain, camo, and canvas textures, plus standard and 3D raised effects, so you can match the exact look your brand needs. If you’re not sure which material fits your fabric and use case, compare patch styles before you order.
Got artwork that needs cleanup for production? The professional design setup service converts your file into something ready for heat application, so you’re not troubleshooting a design problem in the middle of a press run. When you’re ready, head to the custom patches page to build your order, request a sample, and get your project moving.
Frequently Asked Questions
Can you really press a patch onto fabric without any sewing at all? Yes. Heat-applied patches use a hot-melt adhesive backing that bonds permanently to fabric under the right combination of heat, pressure, and time. No stitching is required for the bond to hold.
What temperature should I use to press a patch without sewing? Most patches bond between 300°F and 350°F depending on the adhesive and fabric type. Cotton and denim tolerate the higher end, while PVC, silicone, and elastane blends need lower heat.
Do heat-applied patches survive regular washing? Yes, when applied correctly and given a full 24-hour cure before the first wash. Cold or warm washes, gentle cycles, and skipping fabric softener all extend patch life significantly.
Should I still add stitching to a heat-applied patch? Not always, but it’s a smart addition for workwear, outerwear, or anything washed weekly. A light reinforcing stitch around the edge adds durability without undoing the clean, no-stitch look the heat application gives you.
What’s the biggest mistake people make when pressing patches without sewing? Skipping the test press. Fabric batches vary, and a setting that works on one denim lot can underperform on another. A quick test press before a full production run catches that difference before it becomes a returned order.
Sources
- How to Apply Custom Patches: Get Better Results in Less Time - Transfer Express Blog
- Iron-On Patches for Garments: Complete Application Guide and Fabric Compatibility - Alibaba.com Seller Blog
- A Guide of Common Issues with Heat Transfer Patches
- Iron On Patches for T Shirts: The Complete Guide – Raccoon Transfers